We've been making a little project here of eating fresh and local. What could be more fresh and local than finding wild food and making it delicious?
Wild sumac lemonade has been on the list for a while. Our bees definitely enjoyed the sumac flowers this spring. Now that they've gone to seed, it's our turn.
See the seed heads up there? Pinkish brown spikes.
Jason bringing some over. The limbs are very soft, so it's easy to bend them down and pick them.
Here's an up close look. We just filled a big bowl, poured cold water over the top, closed the lid, and let it steep for 2 hours.
Then strain the water off and sweeten to taste. We used sugar syrup. This was really tasty and refreshing! Yumm.
It's raspberry season. We finally made it to the pick your own farm for the final days of summer berries and the beginning days of fall berries. Pick your own farms are HUGE in Connecticut.
We brought home 6 pounds of berries. Enough for jam and some to eat.
The berry juice stained my wedding ring. I think I could get behind a pink diamond.
Berries reserved for eating.
Boiling jam
This jam is so good that I could turn into Joey Tribiani and take a jar to the movies with a spoon!
This is CSA week one: veggies--romaine lettuce, snap peas, beets, asparagus, dill; meats--1 lb ground pork, 2 pork chops, beef short ribs; cheese--Bloomsday (raw cow's milk, aged): bread--rye; anxiety--5 lbs of meat cuts that I've never in my life prepared and some I've never eaten.
The meats were frozen, so I made a toasted cheese and dill sandwich with a lettuce and dill salad. Then I spent 2 days looking for recipes online.
First family meal: pork chops sprinkled with 1 tsp of lemon pepper each, pan fried in olive oil with conventional red onions. Beat greens, asparagus, and conventional mixed mushroom couscous. First family reactions: pork chops and couscous eaten by all, veggies eaten by adults, quote from husband, "I was really skeptical about this, but you have no idea how happy/excited I am to have you cooking and eating a pork chop. ... Part of me is really mad that you're eating my meat."
Everything I saw online said to cook the short ribs forever, either braising in the oven or crockpot. Jason wanted to use the dry rub we usually use for salmon and smoke them for hours on the Weber Smokey Joe. I said fine, wrap the beets in foil and put them on too. 3 hours later, the food came in: Perfect roasted beets, and inedible meat. It was impossible to separate the muscle from the fat. A couple ribs were wasted in our first attempt to eat them.
The next morning, I put the remaining ribs in the crockpot with a quart of chicken broth. After 4 hours, the meat was perfect. The broth became a rich, dark, hearty liquid that I made into French onion soup the next day with more toasted cheese sandwiches. I used more cheese and dill making omelets. The yogurt went into smoothies, the milk is always drunk effortlessly.
At the end of week 1, we have remaining: 1/2 of the cheese, lettuce, yogurt, and the dill; all of the peas; 2 cooked ribs, and the frozen pork. After week 2, we have remaining from week 1: part of the cheese. Wasted from week 1: 2 ribs we didn't know how to cook properly. All the rest was [eventually] consumed.
Jason is mildly annoyed that my new meat adventures are culinary successes and his attempt didn't quite work out, but mostly he's happy to have new meats on the table. Next time lets hope we have universal success.
This summer, I threw in the towel. With 3 kids, 5 and under, I just accepted that I have absolutely no hope of even pretending to grow a garden. There's no tending a garden with an infant around. And even in the best years, we've struggled to get actual food from our garden. Year 1 was especially wet, I planted a lot of carrots and beats and other root veggies, and they drowned. Year 2, we raised ground level by 4 inches with soil, compost, and spent mushroom medium--we had tremendous success with greens that year. Filled an entire freezer with beat greens, but not much else. We tried alpaca manure (amazing stuff!), but that was the year the whole East Coast got late blight and the tomatoes and peppers shriveled away. The next year, we tried planting the whole garden in an early pea crop. The plants were supposed to be 18 inches tall, and Jason convinced me trellises were unnecessary (OK, I agreed easily. I had an infant). The plants grew to 6 feet tall, the weather was cool, so the pea season was looong, and I picked peas wading through vines like sysiphus pushing his rock up the mountain.
We've had moderate successes with 1 plant at a time: the beat year, the pea year, occasionally a good tomato week before the hornworm army, or a few zucchini before the stink bugs get them, but we have yet to have a really good diverse season of food. So this year, I'm buying someone else's good diverse season of food. I've joined a CSA (Community Supported Agriculture). It's farm direct with an annual commitment to take whatever crops are successful. I wanted to join one a decade ago when we first moved to Connecticut and lived in a tiny landless apartment, but I couldn't find one. Since then, several have turned up, compiled here by NOFA. The one that really caught my eye is Highland Art Farms. Last year, Kelly Baker ran it as a meat CSA of pastured, heritage breed beef. Over the winter, she lost her land lease. So this season, she's set out to provide a Whole Diet CSA, aggregating the fruits of others' labors. There are fruits and veggies, meats, dairy, grain, and coffee. She gives the option to mix and match full or half shares.
I signed up for 1/2 shares of produce and meat, a loaf of bread, 2 gallons of milk, a pint of Greek yogurt, and a cheese, picked up weekly. My commitment signs me up for a big adventure in eating. It's an adventure because I have no way of knowing what or how much will be in my box. It could be a variety of fruits and veggies, or it could be a big box of cabbage. For me, an even bigger adventure is the meat. I gave up red meats 16 years ago. No beef or pork, and only goat or lamb as a rare novelty. I quit eating it for environmental reasons. I learned it takes 100 lbs of grain to produce 1 lb of beef, I learned how unnatural a grain diet is for cattle and how it leads to new diseases like life threatening e. Coli, I learned about the deforestation of the Brazilian rainforests to graze cattle, I learned about overuse of antibiotics and synthetic hormones and other pharmaceuticals, I learned about the damage to the deserts grazing causes, I learned about the constructed seas of hog sewage, and I decided it was time to opt out. I don't want to be a consumer and therefore a contributor to all of that.
So I gave up red meats on the spot and spent about half that time as a vegetarian. I've been a vegetarian for years at a time, and then a trip to the coast would start me eating fish; Or the difficulty of getting good vegetarian options from my corporate American workplace would drive me to eat chicken. Since I've been either pregnant or nursing for most of the last 6 years, I've been craving protein. The whole diet CSA offers meats raised in a holistic way, on pasture without pharmaceuticals, so I'm giving it a try. I know, 20 weeks is a helluva try, but I think I'm up for it.
Have you heard about these? They're starting to be all the rage. Word is that you can stop using fabric softener altogether, and just throw a few wool balls in the dryer. They're supposed to help fluff your clothes, reduce drying time, and prevent static. They're especially popular among the cloth diapering crowds (which I'm a part of).
I've been hearing so much about them, and they popped up on one of those deal-a-day site, so I broke down and bought a set of 3. Do they live up to the hype? Well, maybe. I'm not in a position to sit around and time the dryer or stack up my towels and measure loft. But in the last month, I haven't used any fabric softener except for when I've washed our microfiber blankets (and those are static factories!!). Fabric softener can leave residue on your clothes that will take a while to wash out. So I don't know if it has washed outs and the balls are working, or if it's just softener residue leaving my clothes so soft. Either way I''m using less fabric softener.
I came across this tutorial for making your own dryer balls on craftgawker, and I decided to give it a try. I followed the directions exactly, except I skipped the wool roving step at the end. My yarn was designed for felting, and I didn't want to add another product to the shopping list, so I skipped it. Besides, I had selected a nice colorful yarn, so the pretty wool roving would've hidden it. I bought the yarn from my fabric/craft superstore: Bernat brand Felting Natural Wool, color 94222 "Snap Dragon".
After the first pass through the wash, the yarn was still pretty separate, but I just let them go for a few dryer cycles (the dryer will be their new home anyway), and after a few more tumbles, they became nicely felted together. SUCCESS!! You can also add a few drops of essential oils, The set I purchased was lavender fragrance, yumm.
Was it worth the effort? Well it only took about 15 minutes to wind the balls. The yarn cost around $7 for 2.6 ounces, and I made 2 from it. You could go with as little as 1 ounce per ball, I think. The set I purchased was around $20 for the 1/2 off deal. I see them on Amazon for as low as $20 and on Etsy with prices ranging up to $60. I also find it very satisfying to make something useful, and with 3 kids under the age of 5, its difficult to get anything started never mind finishing, so a 15 minute craft is a dream come true.
One more word of caution, these get lost in the wash easily! They disappear up a sleeve, or get balled up in the corner of your sheets. The set I bought was natural colors, beige and tan. I have already lost a ball that I know was in the dryer when I started it, and disappeared after the cycle. In the future, I will be using BRIGHT colors.
I've seen tutes for wool felted cat toys, bowls, covered soaps, and this delightful bowl. I am interested...
For Halloween this year, my 4 year old wanted to be a ghost--a sheet ghost. I think he's been watching too much Scooby Doo. So I've never actually seen anyone do this, but it seemed a) kinda lame, and b)a little dangerous in terms of keeping little eyeholes lined up with little eyes. So I did what any mother does, asked every few days what he'd like to be hoping for a different answer, and started thinking of ways to keep a sheet in place on a little body. Sleeves? Big face hole alla Scream? Cape with Hood? I bought materials and continued my campaign against the ghost.
At the beginning of October, I revised my strategy, and started pushing options via online photo searches. Thanks to the wonders of the Internet, a "Hack-Man" app, and some quiet coaxing, was able to morph a sheet ghost plan into a PAC-Man ghost plan. Woot-Woot!!
I still didn't have much of an implementation plan, and the Internet failed to offer up a nice tutorial. But I plowed ahead, purchased Costume grade satin and 1/2 inch foam, then improvised. A small creative miracle happened because the costume is nearly perfect.
Unfortunately for the next frantic searcher looking for a ghost costume, I didn't take progress photos to make a tutorial for them.
Some quick tips:
1 cut a headhole in the center of the foam. (I used 42x24 inches for my 44 inch child)
Cut 4 trapezoid shapes evenly spaced in the bottom edges on either side of the foam.
Cut 2 pieces of fabric with 4 inches clearance on all sides (50x32 for me)
Make eyes. I used 2 CDs offset to make an oval shape for the whites, and a water bottle for the blacks. Both from fleece, zigzag stiched to appliqué to each other then to the satin.
Then sewed the 2 pieces of satin together to make a long tube.
I traced the trapezoid scallop onto one inside out edge of the tube and sewed w 1/4 inch seem allowance, then repeated on the other side.
Turn right side out, stuff w foam, cut headhole into satin w 3/4 inch seam allowance.
Zigzag head hole closed, then cover seam w a tube of robbed knit fabric.
Close stuffing seam.
Sew sides together near edge leaving openings at top for arm holes.
And done.
Oh, and did I mention it's reversible with a white ghost on the inside!?
Too bad this was the year Connecticut called off Halloween because of a freak snow storm 2 days before that shut off power to most of the state for days and days.
This is my old nursery, which I love-love-loved through my 2 boys. The bedding is a commercial set that was available at the major baby stores 5 years ago called Zanzibar. I just had a baby girl, and I was going to keep the nursery the same for her. I love it, it's unisex (a boyish unisex, but nonetheless), and it would be wasteful to change it.
Then in his enthusiasm about having a baby girl, my husband volunteered to paint. He hates painting, truly hates it! So of course it was an offer I couldn't refuse. I started browsing colors schemes and fabrics, wanting a more home made look this time around, Pinterest became my friend and near constant companion. I finally settled on aqua and pale orange for the colors. Next came the search for fabric. I can tell you from what I saw online that aqua/orange is going to be the IT color combination next summer, but it hasn't hit yet. I searched for months and months, online and in all the local fabric stores. I finally gave up on finding the perfect pairing of aqua/orange in a single print, but I found these:
Since it took me so long to find colors and fabrics, there were only a few weeks left in my pregnancy to implement. Instead of doing useful things with the little bits of free time we have, my household was struck by a string of malignant colds that waylaid us. Fortunately my mom's new baby visit started 1 1/2 weeks before baby's arrival, and I put her to work in my sweatshop. She painted and sewed and plotted and knocked out most of what I had planned. I wish she could stay forever and finish my projects and keep us all company. Thank you soo much, mom!! Pictures of the resulting nursery and hopefully a few tutorials will be coming...
My son started preschool this fall. One of the things I love about his school is that they do crafts every day. The teachers are very creative with the crafts, and they use the time as an opportunity for the kids to manipulate all kinds of mediums. Here are some of my favorite projects so far:
Apple Trees. I was parent of the day when they made these. The branches are handprints, they used their arms to stamp the trunk, and dotted red apples with their pointer fingers.
String Leaves. They did these by dragging string through the paint, then across the paper.
Paper Plate Pumpkins. An easy one: paper plate, orange paint, cut out eyes, nose, and mouth.
Marble Spider Web. Similar to the String Leaves, but this time rolling marbles in black paint then across the page.
Turkey. This may be my current favorite. The handprint turkey where each finger was painted a different color for the tail and the palm and thumb made the body and head. Add legs, waddle, and beak plus a google eye. The teacher wrote what each kid said they were thankful for. Jackson said, "My rooster and my chickens." We were asked before leaving if we had chickens, or if Jack was making up tales. In an earlier activity, he said he was thankful for "his mom and dad and brother Jonah."
Pudding Paint Bear. Self explanatory with google eyes.
I'm looking forward to the upcoming projects. I hear they're making gingerbread men from sandpaper next week.
I bought a new Ergo carrier from the folks at babysteals. I was a little apprehensive about it, but I convinced myself that there was bad lighting in the picture and the real thing would be beautiful. In real life, the carrier was worse than in the photograph. It was black with flower embroidery details in the most shocking pink, gold, and blue jewel tones. The colors were so bright that I was reluctant to wear it out in public. I've heard many people love their Ergo's and I wanted to love mine too, but I just couldn't.
I tried unpicking the embroidery. Unpicking it didn't harm the fabric, but they had done such high quality needlework, that I couldn't get the thread to come out. So I had to take drastic measures with my old friend the Sharpie. I've used the Sharpie before on fabrics: to cover scuffs on my black shoes, and to blacken the white stitching on black jeans (a decade after Girbaud Jeans made white stitching cool). In the case of the jeans, the Sharpie worked great, but it washed out and needed to be redone before each wearing.
So with some experience under my belt, and no intention of laundering the carrier frequently, I picked a discrete location to try my fix. I liked it and proceeded to recolor all of the embroidery. It turned the glaring jewel tones into muted accents. The gold became brown, the pinks became dark purple, and the blues turned to navy.
I adapted the super sweet bunny finger puppets from purlbee http://www.purlbee.com/bunny-finger-puppets/ from a hand sewn and embroidered version to a glue gun, marker, and stick on eyes version. It's now perfect to hold the attention of an active 3 year old.
You'll Need:
1 square felt in each color.
I used white (1 square felt made 4 bunnies plus extra. Probably could make 5), pink, orange, green, and blue.
Disappearing ink fabric marker
Hot glue gun and glue sticks
Markers
Stick on gems, google eyes, or other eyes of your choosing
pom poms.
First, download a copy of the bunny pattern http://www.purlbee.com/storage/bunnypuppet.pdf and cut it out. Trace it using your disappearing ink marker twice each in white and colored felt for each bunny you plan to make. Then cut all of your bunnies out. I did this in advance to keep the working time short with my child.
Stick eyes on each bunny (Perfect job for the 3 year old) and draw on the whiskers and noses. Be careful to make pairs of white bunnies that face each other so that you'll have a left and right profile when they go together.
Word of caution: Warn your child repeatedly of the danger of the hot glue gun. Do all hot glueing yourself and enlist the little one to hand you parts.
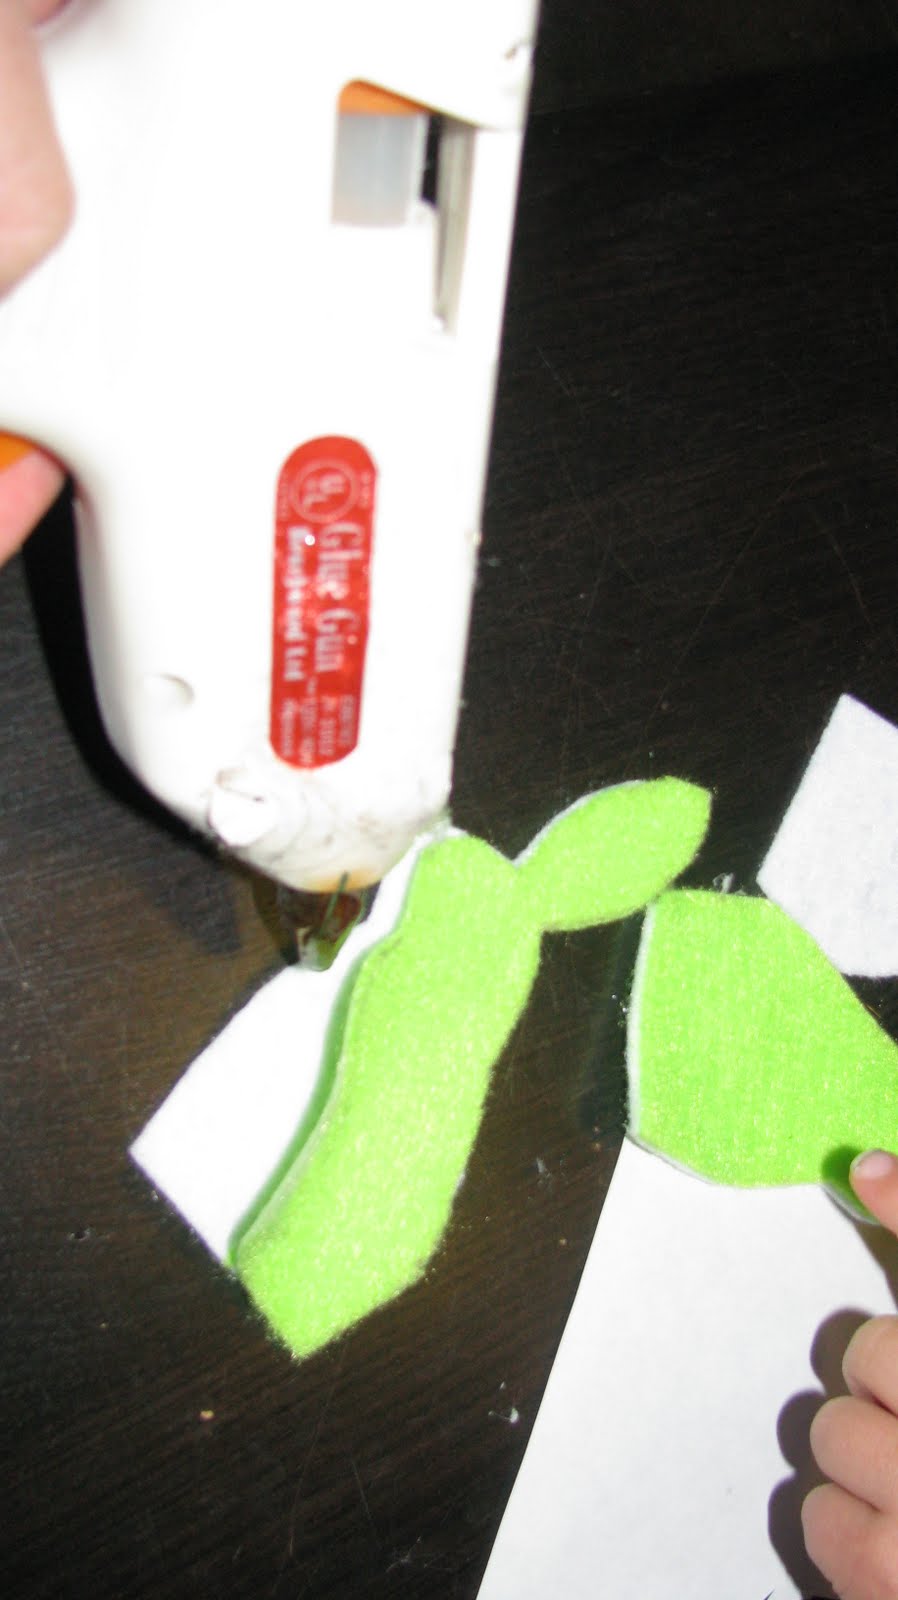
Run a bead of glue around the backside of a white bunny and glue down a colored bunny. I found the glue got too cold to do the full bunny at once, so I did 1/2 at a time. You'll go around the full perimeter including the ears and bottom. Repeat with the remaining pairs of white and colored bunnies. Next you'll run a bead of glue around a colored bunny to mate the pairs. This time, you'll leave the bottom open and glue around the head (not the ears). Add a dab of glue to the rump and glue on a pom pom tail. I also folded my bunny ears back and added a dab of glue so the colors show. I think the glue gunned bunnies must be a bit stiffer than the hand sewn version. That's it, done!
Sorry, I'm too lazy to steal their pictures and post them here.
And realistically, I won't be making these any time soon, but I do love them. Maybe Saturday (if I don't have a new baby by then) I'll adapt the bunny finger puppets from felt to craft paper and document the adaptation for a tutorial here. That sounds like a good snowy day activity for a 3 year old.
I love these baby blankets. I was given one for my newborn, and 3 years later its still in heavy use. We keep it in the car for travel. The blankets are big enough to be useful, but because they don't have batting, they still fold up compactly and tuck into a bag. I also take them with me on flights.
There are 2 variations, one with straight edges and rounded corners, or one with scallop edges. I stopped making the scalloped style because it takes twice as long, but I'll still try to explain it here. If I'm not successful, I adapted my pattern from one found in the book "Bend the Rules Sewing" by Amy Karol--pick up a copy for yourself, or visit her blog The Angry Chicken.
To make without scallops,
1 Yard each of 2 Contrasting Flannel Fabrics
Thread
Salad Plate (To Trace Around)
With flannel, the layers stick together, if you don't use 2 flannel layers, you'll need something to help stick layers together. I lay mine out on the floor since I don't have a table big enough, right sides together. Use a salad plate to trace as a pattern for round corners. Cut the 2 pieces of fabric together all the way around, cutting off the selvage edges so that the 2 pieces are just the same size. I use the rotary cutter for all of the cuts, careful not to cut the floor since the blankets are bigger than the cutting mat. Safety pin the fabric together. I pin the center, corners, and every 6-8 inches around the edges. Put the pins in about 1 inch so that you have room to sew around the edges.
Sew around the perimeter as close to the edge as you are comfortable with. Leave a 6-8" section open so that you can turn it right side out.
Remove the pins, turn it right side out, smooth the corners, and iron around the perimeter. Carefully turn the edges under where you left it open, iron and straight pin in place. Now sew around the right sides with contrasting fabric.
Presto, you are done.
If you get 1.3 yards of fabric, you can make some matching burp cloths, cut to a reasonable size, maybe 8" X 15" and use the same sewing methods as the blankets.
To make with scallops (top picture lower right)
1.3 Yards each of 2 Flannel Fabrics. (The Scallops Make the Blanket a Little Smaller.)
30” length of Freezer or Butcher Paper
Salad Plate for Tracing
First trace the plate ¾ of the way around to make the corner, line up the plate tangent to the paper edge. Then move the plate down a bit, line the tangent up with the paper edge and trace 1/3 of the plate, so that the tip of your 1/3 touches the tracing you made at the corner. It should touch the line, but I didn't check the math, so you probably won't be at the edge of the corner plate tracing line. Move the plate down again and trace 1/3. Continue until you're out of paper. You can probably also trace it on the short edge to help line up the pattern on the other edge. Cut around your pattern.
The first blanket I made, I traced ½ of the plate for the scallop. It was still cute, but the scallops were pretty floppy. It's in the top picture, lower left.
Lay out your fabric as I described above, right sides together. Use a water soluble disappearing ink marker to trace the pattern onto the fabric. When you iron with steam, the marks will disappear. Start at one corner and trace the pattern down the side edge, you want to be far enough in that the selvage edge will be cut off. Flip your pattern over to make the next corner and trace pattern toward your initial marks. It probably won't line up perfectly, but that's OK. Just trace it. Then go back and adjust the scallops so that they gradually meet up. No one will notice this. Repeat this process around the other 3 sides. Cut the fabric around your traced lines, and safety pin together.
Sew around the edges close to the edges. Leave a scallop open for turning. After sewing, you can clip the rounded corners so that it turns smoothly. At a minimum, clip the corners where the scallops meet or it will pucker.
Take out the pins and turn the fabric right side out. Push your finger around the inside of each scallop to make sure its fully turned and smooth. Iron around the perimeter. Carefully turn the edges of the open scallop, iron and straight pin. Sew around the perimeter with a contrasting thread color. That's it, you're done.
Skill Level: Easy to Moderate (with scallops)
Time: 1 hour for straight edges, 2 hours for scalloped + 1/2 hour to make the pattern
Cost: $5-$18 depending on fabric source and sales
Check out these stenciled T-shirts from my favorite periodical. They also have instructions for turning any picture into a stencil. If I have the energy to try that out, I'll blog all about it.
If you forget to isolate your project when you spray adhesive...or your toddler uses a full can to tar and feather his room (as happened to me), don't despair. Pour some rubbing alcohol on an old rag and wipe the adhesive away. I had success with this on the wall, radiator, and wool rug. No marring, no trip to the store, and little worry about harsh chemicals.
To make Easy Wall Art
The big plans I had for the leftover fabric from Quilted Wall Panels comes to fruition. I had fabric for six 5 inch square pieces.
Other Items:
Cutting mat & rotary cutters (or scissors)
Straight Edge 12" with cutting guides every 1/2"
Repositionable Adhesive Spray
Staple gun with staples
Cutting:
Cut fabric panels. My canvas was 5" X 5" with a 5/8" edge. I cut the panels 7 3/4". If your fabric/canvas is a different size, make sure you have enough to cover the edges plus an extra 3/4" or so each side to staple to the back.
Mount Fabric on Canvas: Spray the front of the canvas with repositionable adhesive, do this inside of a box so that you don't get overspray and end up with a sticky table. Let dry 30 seconds. Lay the canvas on the fabric, making sure it looks even. Hold the fabric against the back of the canvas on one side, and flip over. Lightly pull the fabric around the edges to see if its straight and centered. If not, peel fabric off and try again.
Gently wrap 1 edge of the fabric around the edge of the canvas, making sure it is smooth and taught (don't stretch fabric). Staple in place in center. Repeat with remaining 3 sides. (The picture shows me doing 1 edge, then working around the corners. On subsequent canvases, I found it easier to staple the centers of each side in place first, then work the corners)
Pull the corner fabric over, making sure you have it centered well. Hold the corner in place, and fold 1 edge neatly near the corner. Staple in place. Fold the other edge against the corner and staple. Repeat with remaining 3 corners. The corners will pucker slightly, but try to make them as smooth as possible.
My staple gun doesn't staple tight against the surface, so I tapped the staples in with the hammer.
Repeat with the remaining canvases.
Hang. To make hanging simpler, I measured and marked the wall first, centering the first dot on the wall at height. I used the laser level to make sure I was level, and put the next dots 5 3/16" to the right or left of the first dot. Then measured down 5 3/16" from the center dot, leveled and make the left and right dots. The extra 3/16" between marks allowed space for the wrapped fabric corners. I put a wire nail at each dot and hung the 6 canvases as a unit.
Difficulty: very easy
Time: <1 hour total
Cost: $14 stretched canvases
I had the staple gun and adhesive on hand, and used the leftover fabric from the Quilted Wall Panels, so I didn't price them out.
To make quilted wall panels
This fabric made 4 panels. There's even extra, which I have big plans for and will hopefully post here soon.
You need:
1 panel printed fabric (COGSMO BY COSMO CRICKET)
2/3 yard Plain fabric for backing (Symphony Broadcloth 5468 DST GR)
2 packages Satin Blanket Edge (Sage)
2/3 yard Thin quilt batting
1 spool thread
1/4" 50" total wooden dowel
1/2" metal or plastic rings 4 each
Other Items:
Sewing Machine
Cutting mat
rotary cutters
Straight Edge 12" with cutting guides every 1/2"
Scissors
Safety Pins
Straight Pins
Cutting:
Cut fabric panels, allow 3/8" around edges for seaming
Cut plain fabric to match dimensions of fabric panels
Cut 3" strip of plain fabric same width as fabric panels
Cut quilt batting to match dimensions of fabric panels
Sewing:
I use a 3/8" seam allowance
Turn 1 long edge of 3" plan fabric strip 1/4" twice to finish edge.
Sandwich the quilt batting between the panel and plain fabric (right sides facing outward). Match 3" strip of fabric to top of sandwich (this makes a pocket at the top for the dowel).
Safety pin at center and along edges.
zigzag stitch around borders of sandwich (this step is optional on panels that are approximately 12" square, necessary on larger panels).
Repeat with remaining panels.
Trim. You can either use a single piece of satin trim to edge each panel, and make neat mitered corners, or use 4 strips of satin trim with square edges. I do the latter since I've had great difficulty trying to fold the corners over to miter them.
Cut strips of satin trim to the height of each panel plus 1". Note that the trim is 1/16" wider on one side than the other, the wider edge is the back. Straight pin in place, sandwiching the trim around the panels and in 3/8" from the edge of the panel. The trim should extend 1/2" beyond the panel at top and bottom. Sew 1/8" from edge of trim on front. Repeat on each side.
Cut strips of satin trim to the width of each panel, including the trim you just sewed in place, plus 1". Straight pin in place, sandwiching the trim around the panels and in 3/8" from the edge of the panel. The trim should extend 1/2" beyond the panel at left and right. Carefully fold the cut edges of the trim over 1/2" so that the back side of the trim folds inward and the front edge sandwiches the raw edge of the left/right trim inside of the fold. Pin in place. Sew 1/8" from edge of trim on front. Repeat at top and bottom.
Fold panel in 1/2 to find center, and handsew a 1/2" ring to the panel just below the top piece of satin trim.
Measure the width of the panel at the top. Cut a piece of dowel to this length. (I use the rotary cutter to cut part way into the dowel, spinning it to cut around, then bend to snap). Insert dowel in pocket at top of panel.
Repeat with remaining panels.
Options:
These panels strike me as kind of plain. I wish I had added additional quilting before putting on the satin edging. I'm afraid that if I did it now, I'd end up with bunching. If you add additional quilting, start at the center and work your way outward. You could add satin stitching (a very tight zigzag) around some of the borders in the print using a matching thread--for example the bodies of the robots, or try outlining the inner borders using a straight stitch. If you do either of these, make sure your bobbin thread matches the plain fabric backing.
Difficulty: moderately easy
Time: 2 hours total
Cost: $8 Cogsmo fabric, $2 plain fabric, $12 Satin Trim, $2 dowel, $3 thread. Total Cost = $27
(My cost $14 since I had most of this stuff in my craft closet already)
I made these animal panels for our nursery. The bedding set came with a bed skirt for the crib that I couldn't use since the crib had drawers beneath. I disassembled the bed skirt, cut it into square panels, and added trim to the edges using the same method described above. These panels had quilted animals on them, and don't warrant any extra embellishments.
After much deliberations, I settled on decorating my son's room with a robot theme. I found some great fabric (Cogsmo by Cosmo Cricket from Andover Fabric), but I was only able to get a yard of the cogs and 1 robot panel. To cover 2 full windows, I had really had to stretch the yard of fabric!
My windows are 32" wide by 55" tall. Window trim is 4" wide Your valance should be close to 2 times as wide as the window, the curtains should be 1.3 to 2 times as wide as the window.
To make Valances (set of 2) These are double thick on the fabric, it looks more professional than a single fabric valance.
Other Items: Sewing Machine Cutting mat rotary cutters Straight Edge 12" with cutting guides every 1/2" Scissors
Cutting: Print Fabric. Cut into four 10.5" strips perpendicular to the selvage edge (will be 36" wide) Plain Fabric. Cut into 2 22.5" strips, perpendicular to the selvage edge (will be 72" wide)
Sewing: I use a 3/8" seam allowance
Sew 2 strips of print fabric together (right sides facing, make sure the pattern runs the same way) to make a strip 10.5" by 71.5". Repeat with other pair of print fabric.
Sew 1 strip of print fabric to 1 strip of plain fabric along the long edges (right sides together). Unfold. Trim to even edges (plain fabric is probably longer than print). Hem short edges of fabric 1 turn.
Match remaining long side of print fabric to long side of plain fabric (right sides together). Sew. You now have a tube of fabric.
Sew edges of the tube together along printed portion only (leave plain portion open on edges). Turn tube right side out. Carefully sew along edge of plain portion so that it turns an equivalent amount to the print portion you just sewed. Be careful to sew through front and back separately so that the ends remain open for the curtain rod.
Sew front and back together following the top edge of the printed fabric. Make another seam 1.5" from the top edge of the valance.
You've finished the first Valance. Repeat with remaining fabric. To Make Curtains (set of 2)
You need: 3.3 yards coordinating fabric 45" wide (Symphony Broadcloth 5468 DST GR) 1 spool thread (same spool as valance was just enough) 2 tension curtain rods
Other Items: Sewing Machine Cutting mat rotary cutter Straight Edge 12" with cutting guides every 1/2" Scissors
Cutting: Cut the fabric to length, should be 5" longer than the window. My curtains fit inside the window fram of a 55" window, so I used two 60" lengths fabric (one for each window). The 45" wide fabric was just wide enough to get by with on my 32" windows.
Sewing: I use a 3/8" seam allowance
Turn the selvage edges of the fabric over 1/2" two times and seam to make a nice finished edge for the height of the window. Turn the cut edges over once each. At the top, turn the edge over 2" and seam close to the turned edge to make a pocket for the rod. Measure the fabric and hem the bottom edge to fit the height of the window. In this case, it should be 2". Repeat with second curtain panel.
Congratulations, you're done!
Difficulty: Curtain = very easy. Valance = moderately easy Time: 3 hours total Cost: $8 Cogsmo fabric, $11 plain fabric on sale, $3 thread. Total Cost = $22